Frequently Asked Questions
How to install artificial grass?
Installing artificial grass involves preparing the area by removing existing grass and debris, leveling the ground, laying a weed barrier, and securing the turf with stakes or adhesive. Finally, infill the grass for added stability and a natural look.
What are the steps for installing artificial grass?
The steps for installing artificial grass include preparing the area by removing existing grass and debris, leveling the surface, laying a weed barrier, adding a base material, securing the turf, and finally infilling for stability.
What tips can help with artificial grass installation?
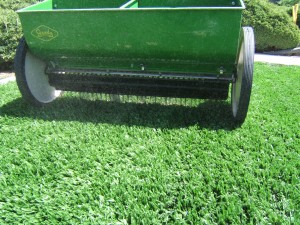
Tips for successful artificial grass installation include thorough site preparation, ensuring proper drainage, using high-quality materials, and following a detailed installation guide. Additionally, consider using a power broom to enhance the grass's appearance after installation.
What tools are needed for artificial grass installation?
The tools needed for artificial grass installation include a utility knife, measuring tape, landscape fabric, a shovel, and a rake. Additionally, you may require a power compactor and adhesive for securing seams.
How do I prepare the ground for installation?
Preparing the ground for installation involves clearing the area of debris, removing existing grass, and leveling the soil. Ensure proper drainage by grading the surface and compacting the soil to create a stable base for the artificial turf.
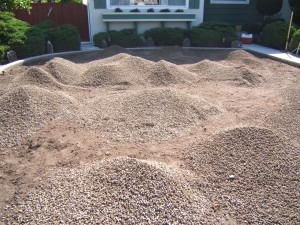
What is the best type of base material?
The best type of base material for installing artificial turf is crushed stone or gravel, as it provides excellent drainage and stability, ensuring a durable and long-lasting surface for your synthetic grass.
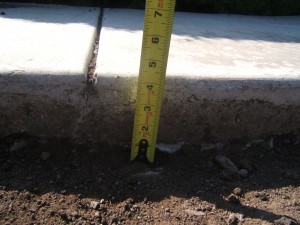
How do I measure the area for grass?
Measuring the area for grass involves calculating the length and width of the space. Multiply these dimensions together to determine the total square footage needed for your artificial turf installation.
What are common mistakes during installation?
Common mistakes during installation include inadequate ground preparation, improper drainage, failing to secure seams, and neglecting to use enough infill. These errors can lead to uneven surfaces and reduced longevity of your artificial turf.
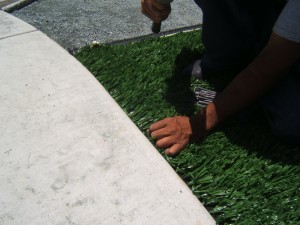
How do I cut artificial grass accurately?
Cutting artificial grass accurately involves using a sharp utility knife or carpet cutter. Measure the area carefully, mark your cut lines, and ensure you cut through the backing for a clean edge.
What adhesive should I use for seams?
The adhesive to use for seams in artificial turf is a high-quality turf seam tape and adhesive specifically designed for synthetic grass. This ensures a strong bond and durability for your installation.
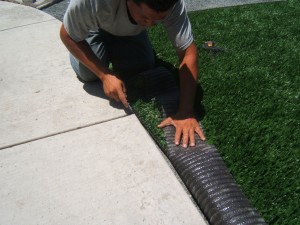
How do I secure the edges of the grass?
Securing the edges of the grass involves using landscape staples or adhesive to anchor the turf down. Ensure the edges are tightly fitted and apply weights or edging materials to keep them in place for a seamless finish.
What is the ideal weather for installation?
The ideal weather for installation is mild and dry conditions. Temperatures between 60°F and 80°F are optimal, as this ensures proper adhesion and prevents complications during the installation of artificial turf.
How can I ensure proper drainage?
Ensuring proper drainage is essential for your artificial turf installation. To achieve this, create a slight slope in the base layer, use perforated drainage pipes, and incorporate a gravel layer to facilitate water flow away from the surface.
How do I maintain artificial grass after installation?
Maintaining artificial grass after installation involves regular brushing to keep the blades upright, rinsing with water to remove debris, and checking for any weeds or damages. Additionally, ensure proper drainage to maintain its appearance and longevity.
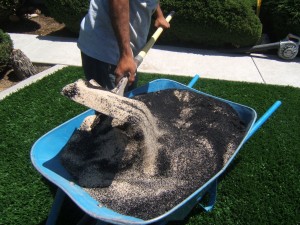
What are the benefits of using infill?
The benefits of using infill are: it enhances the stability and durability of artificial turf, provides cushioning for better shock absorption, helps maintain the grass blades' upright position, and contributes to improved drainage and temperature regulation.
How do I choose the right grass type?
Choosing the right grass type involves considering your local climate, intended use, and maintenance preferences. Evaluate options based on drought resistance, durability, and appearance to find the best fit for your outdoor space.
Can I install artificial grass over concrete?
Installing artificial grass over concrete is possible. However, proper preparation is essential to ensure adequate drainage and a secure fit, often requiring a layer of shock-absorbent material beneath the turf for optimal results.
How long does the installation process take?
The installation process for artificial turf typically takes one to two days, depending on the size of the area and the complexity of the project. Proper preparation and installation techniques can ensure a smooth and efficient process.
What is the cost of installing artificial grass?
The cost of installing artificial grass varies based on factors such as the type of turf, the size of the area, and installation complexity. Generally, homeowners can expect to pay between $5 to $20 per square foot, including materials and labor.
How do I handle uneven surfaces during installation?
Handling uneven surfaces during installation involves leveling the ground with a mixture of soil and sand to create a smooth base. Use a compactor to ensure stability before laying the artificial turf for an even finish.
What are the environmental benefits of artificial grass?
The environmental benefits of artificial grass include reduced water usage, lower maintenance requirements, and the elimination of harmful pesticides and fertilizers. This makes it an eco-friendly option, especially in drought-prone areas, promoting sustainable landscaping.
How do I prevent weeds from growing?
Preventing weeds from growing involves several effective strategies. Start by installing a weed barrier fabric before laying your artificial turf, and ensure proper drainage to minimize soil moisture. Regularly check for any weed growth and remove them promptly to maintain a clean, weed-free space.
What is the lifespan of artificial grass?
The lifespan of artificial grass typically ranges from 15 to 25 years, depending on factors such as usage, maintenance, and the quality of the materials used. Proper care can help maximize its longevity and appearance.
How do I clean artificial grass effectively?
Cleaning artificial grass effectively involves regularly removing debris with a broom or leaf blower, rinsing with water to eliminate dirt, and using a mild soap solution for stubborn stains. Ensure proper drainage to maintain its appearance and hygiene.
Can pets use artificial grass safely?
Pets can safely use artificial grass. It is non-toxic, durable, and easy to clean, making it an excellent choice for pet owners looking to create a safe and enjoyable outdoor space for their furry friends.
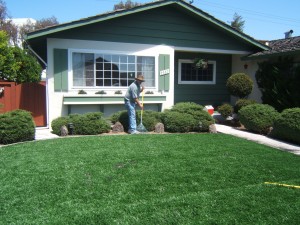
What are the best practices for installation?
The best practices for installation include proper site preparation, ensuring a solid base, using quality materials, and following the manufacturer's guidelines for turf placement and securing. This ensures longevity and optimal performance of your artificial grass.
How do I install artificial grass on slopes?
Installing artificial grass on slopes requires careful preparation and techniques. Begin by leveling the surface and installing a solid base, then secure the turf with landscape staples or adhesive to prevent movement.
What should I do if grass wrinkles after installation?
If your grass wrinkles after installation, you should gently stretch the turf to remove the wrinkles, ensuring it is properly anchored. If issues persist, consider contacting a professional for assistance to achieve a smooth finish.
How can I enhance the appearance of artificial grass?
Enhancing the appearance of artificial grass involves regular brushing to maintain upright fibers, adding infill for stability and a natural look, and keeping it clean by removing debris and stains.
What resources are available for DIY installation?
Resources available for DIY installation include comprehensive guides, instructional videos, and detailed checklists on our website. Additionally, we offer tips on tools needed and best practices to ensure a successful artificial turf installation.