

An artificial putting green is a built area of synthetic turf designed to mimic the look and roll of a natural golf green while cutting maintenance and water use. This guide walks homeowners and landscapers through choosing the right layout, turf, base construction, and maintenance so your backyard green performs consistently for practice and play. Many property owners wrestle with balancing realistic ball roll, drainage, and curb appeal on a tight footprint or budget — this article breaks those trade-offs down into clear, actionable steps. You’ll learn how to measure your site and set goals, pick turf and pile height for the stimp you want, plan contours and hole placement, decide between DIY and pro installation, maintain longevity, and budget for common add-ons. Practical examples, comparison charts, and short checklists will help you move from concept to installation with confidence while keeping key search terms like artificial grass putting green, backyard putting green, and putting green turf types in mind.
Key Considerations When Planning Your Backyard Putting Green
A great backyard putting green starts with a straightforward assessment of site limits and playing goals: measure the usable area, note slopes and drainage, and pick whether the green is for serious stroke work or casual fun. Getting planning right up front avoids costly rework: your base, drainage, and turf choice all depend on how the green will be used and where water will run. Pay attention to sun exposure and runoff patterns — avoid low spots that hold water and consider sightlines to neighbors and paths. Set a realistic budget early so you can prioritize base quality and turf grade; a solid base and better turf deliver steadier stimp speeds and longer life. Below we walk through practical measurement tips and how to translate your goals into green size and hole count.
Start by sketching the usable area and imagining the shots and drills you want to practice. Mark obstructions, hardscapes, and existing irrigation, then turn the sketch into square footage and note grade changes. Match goals to size: small practice patches work well at 100–400 sq ft for short putts; medium greens with multiple holes typically fall between 400–1,000 sq ft; larger multi-hole layouts need more space and more careful base work. Think about placing the green near a patio for convenience or tucked into a quiet corner for focused practice — each choice affects drainage and sun. Accurate measurement informs both your budget and turf choice because stimp expectations change with available run-out and contour options.
Budget planning should list turf, base materials, drainage, labor, and optional features so trade-offs are clear. Residential projects vary: a modest DIY green with basic base work can use lower-cost turf and careful compaction, while a high-performance home green invests in Class II road base or crushed rock and professional grading. Don’t forget hidden costs like drainage fixes, edging, and small landscape touches such as fringe turf or cups and flags. Prioritize a stable, well-draining base and reasonable turf quality over purely cosmetic add-ons — a sound base reduces repairs and keeps roll consistent. With budget priorities set, the next big choice is turf material and pile specs to tune play.
Research on advanced putting green designs reinforces that budget often determines how much topography and complexity you can realistically achieve.
Backyard Putting Green Design: Topography & Budget
This report describes a prototype transformable putting green that can recreate varied topography. The project used paired 4’×4′ modules as a proof-of-concept; a full commercial system would combine multiple modules to reach realistic scales (for example, 12’×32′). Designers originally targeted a 30″ topographical range but reduced scope for budget reasons, producing a 4’×8′ prototype with two 4’×4′ modules and about 6″ of range per module. The study highlights how design ambitions scale quickly with cost. Re-Configurable Putting Green, 2012
Use this checklist to capture the essentials before you order materials or call an installer:
- Measure the usable area and note slope : Accurate dimensions and grade notes avoid surprises during base work.
- Define primary use : Decide if the green is for practice, entertainment, or both to guide turf and layout choices.
- Assess drainage and sunlight : Identify low spots and shaded areas that affect turf performance and base design.
- Set budget priorities : Rank base quality, turf grade, and features so costs match long-term goals.
Working through these items before you pick turf or installers keeps costs predictable and reduces rework. Next we explain how turf material, pile height, and infill affect ball roll and durability.
Which Artificial Turf Types Work Best for Backyard Putting Greens?

The right turf material and construction control playability, durability, and cost. Putting green turf trades plushness for a lower, denser blade to give predictable roll. Material — usually nylon or polyethylene — affects durability and UV resistance; pile height and face weight influence stimp speed and ball response. Infill and backing stabilize the surface and tune pace — sand infill is commonly used to firm the surface and optimize roll. Match turf to intended use: practice greens prioritize durability and consistent roll, while showpiece greens may emphasize appearance. Below is a simple comparison of common product types to help match specs to your goals.
The table compares representative turf SKUs by pile height, material, face weight, and stimp notes so you can match product attributes to your needs.
| Turf SKU (Type) | Pile Height | Material | Face Weight / Density | Stimp / Play Notes |
|---|---|---|---|---|
| Low-pile Practice Turf | 5–8 mm | Polyethylene | Medium density | Faster roll, economical for short practice areas |
| Professional-grade Putting Turf | 3–5 mm | Nylon | High density | Tunable to higher stimp speeds with consistent roll |
| Fringe / Chipping Turf | 12–20 mm | Polyethylene | Low–medium density | Visual transition and holds short chips |
| Multi-use Hybrid Turf | 8–12 mm | Nylon blend | Medium–high density | Balanced feel for putting plus light chipping |
Lower pile heights with heavier face weight favor consistent ball roll, while fringe and hybrid products work well for adjacent play areas. After narrowing material and pile height, consider differences between nylon and polyethylene for durability and cost.
Nylon and polyethylene differ in lifespan, feel, and price. Nylon is tougher and resists matting under frequent play, making it a smart choice for high-traffic or pro-grade backyard greens — its resilience helps maintain stimp consistency over time. Polyethylene is more budget-friendly and fits light-use residential greens where looks and occasional play are top priorities. Factor UV stability, warranty, and how fibers react to sand infill when choosing. Understanding pile height and stimp implications will help you fine-tune the surface feel.
Pile height, blade profile, and infill together determine stimp speed and ball behavior. Lower piles with dense face weight and firm sand infill will generally produce a faster stimp; taller or looser blades slow roll and add forgiveness. Residential greens usually aim for more controllable speeds than tournament greens — homeowners often prefer predictable, practice-friendly pace. You can fine-tune speed with infill depth, brushing frequency, and small base contours. The next section covers shaping the green: contours, hole placement, and features that add realism.
Knowing the physics of ball roll on a putting surface helps you optimize green performance and hit your target stimp speeds.
Optimizing Ball Roll & Trajectory on Artificial Putting Greens
This study develops a model linking putter backstroke and putt displacement to post-impact ball movement, using experiments to support the approach. By correlating backstroke, surface friction, and slope, the authors create an algorithm that predicts two-dimensional ball trajectory based on putt input and surface texture, drawing on classical mechanics and finite element analysis. The research helps quantify how surface texture and slope influence putt distance and direction. A Mechanics-Based Approach for Putt Distance Optimization, 2015
Artificial Turf Express carries turf options for a range of backyard goals and keeps stock locally available for pickup and delivery in the San Jose area. Our product selection includes low-pile practice turf, professional putting turf, infill, and accessories — which makes sourcing easier once you’ve picked a material and pile height. Local availability is helpful for testing samples and coordinating delivery so materials arrive on schedule. That’s especially useful when matching exact pile heights and face weights to practice or entertainment needs.
Designing the Layout: Shapes, Contours, and Features
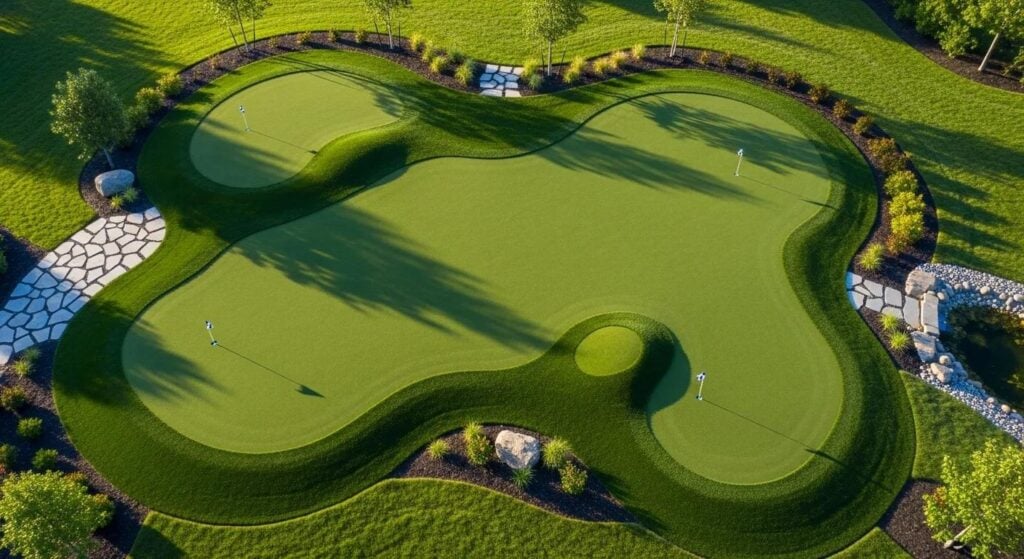
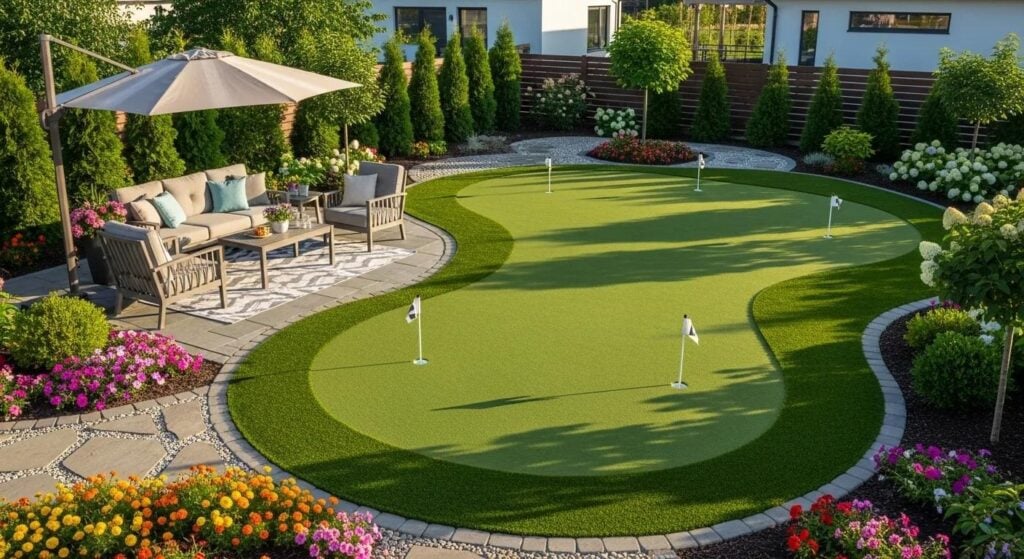
A good layout balances looks, playing variety, and your yard’s constraints. Shape affects how the green fits with landscaping and how players approach shots. Natural, kidney, or free-form shapes blend into irregular yards and soften transitions to planting beds; rectangular or multi-tee layouts suit players focused on repeatable drills. Contours — gentle undulations and subtle breaks — add challenge and realism, but residential contours are usually modest so practice remains predictable. Plan for fringe turf as a visual transition, chipping areas for short-game work, and secure edge treatments to prevent turf lift. The next subsection reviews popular shapes and their uses.
Each popular shape brings practical benefits depending on yard geometry and goals. Kidney and free-form layouts work well in irregular yards and look natural from patios and windows. Rectangular or elongated greens are ideal for repetitive putting drills and short-game stations. Circular or island greens are space-efficient in small yards and can act as focused practice pods. Deciding a shape early helps define hole placement options, contour scope, and base grading expectations.
Contours, breaks, and deliberate hole placement increase play value without exceeding safe residential limits. Small grade changes — often 1% to 3% — create readable breaks without causing drainage issues; micro-elevations up to about one inch can add challenge without major earthwork. Place cups to test different shots: uphill, downhill, and varied slope relationships. A secondary, movable cup location expands practice options. Thoughtful spacing and subtle contouring make a modest backyard green feel dynamic and useful. The next section describes installation choices and when to call a pro.
Consider these design features when planning your layout:
- Natural integration : Shape the green to complement existing landscape and sightlines.
- Play variety : Add multiple cup positions and gentle contours for more practice value.
- Transition areas : Use fringe turf or a chipping pad to connect the green to surrounding surfaces.
- Edge treatment : Specify edging that secures turf and prevents uplift or washout.
Installation Options: DIY vs. Professional
Your installation choice depends on budget, site complexity, and desired performance. DIY can be cost-effective for simple, small greens with light contouring; professional installers are the better choice for complex grading, drainage challenges, or when you want warranty-backed results. DIY projects require careful site prep — clearing, consistent subgrade, compacted base layers, and exact seam work — plus the right tools for compaction and joining. Professionals bring experience hit consistent stimp speeds, build subsurface drainage, and handle permits or neighbor coordination when needed. Consider your comfort with heavy equipment, grading precision, and seam finishing when deciding. The next subsection provides an ordered checklist for site prep and base construction.
Site preparation and base construction follow steps that ensure drainage and a stable surface. First, clear vegetation and remove topsoil to reach your finished subgrade and confirm drainage slope. Install geotextile fabric where needed, then place and compact base material like crushed rock or Class II road base in 2–3″ lifts until you meet grade and compaction targets. Proper compaction minimizes settlement and keeps the turf even; final shaping and fine grading create the contours, followed by tack strips or edging and precise turf fitting and seam gluing. Add drainage outlets or perforated pipes where surface or subsurface runoff needs directing. The following subsection explains when to hire a professional.
Hiring a professional installer makes sense for steep slopes, significant drainage issues, or when you want guaranteed performance and stimp targets. Pros provide consistent compaction, engineered base profiles, and durable seams that are tough to replicate without experience and equipment. Large multi-hole greens or multi-level designs often require heavy grading and permit work; professionals also simplify sourcing and scheduling. If predictable playability and a clean warranty handoff matter to you, investing in a qualified installer is a wise choice. The next section covers routine maintenance practices that extend turf life.
| Installation Option | Skill Level Required | Typical Time | Tools / Materials | Estimated Cost Indicator |
|---|---|---|---|---|
| DIY Basic Install | Moderate | Several weekends | Hand tools, compactor rental, base materials | Lower upfront cost, variable outcomes |
| DIY with Advanced Grading | High | Multiple weekends | Heavy compaction gear, grading tools | Moderate cost, requires skill |
| Professional Install | Low (owner) | Days to weeks | Full equipment, engineered base | Higher upfront cost, predictable finish |
This table lays out the trade-offs between time, skill, and predictability — choosing the right path reduces long-term maintenance and warranty risk. Next, we cover maintenance routines to keep performance steady.
Artificial Turf Express supports DIY customers and those hiring pros by stocking turf, infill, and accessories locally for pickup and delivery in San Jose, CA, and offering installation consultation to help homeowners assess whether a DIY install is realistic. For DIYers, local access to compatible infill and edging items simplifies procurement and reduces delays. For customers using professional installers, coordinating turf selection and delivery through a local supplier helps ensure materials arrive on schedule.
How to Maintain Your Artificial Putting Green for Longevity
Regular maintenance preserves roll characteristics, prevents drainage issues, and extends turf life. Core tasks are debris removal, periodic brushing, and infill checks. Cleaning removes organic matter that traps moisture and causes odors or breakdown; brushing with a stiff, non-metallic broom reorients fibers and prevents matting in high-use areas. Inspect seams and edges seasonally and repair small separations before they grow. Check infill depth and redistribute as needed to keep firmness and stimp consistent. The next subsection lists practical cleaning and troubleshooting steps.
Simple cleaning and troubleshooting start with weekly debris removal and clear spot-cleaning steps for spills. Remove leaves and organic debris with a leaf blower or gentle sweep to avoid compaction and bacterial growth. For spots, rinse with water and mild detergent if needed, then rinse again; avoid harsh chemicals that damage backing or fiber coatings. If you see poor drainage or pooling, probe the base and check for compaction or blocked outlets; small seam gaps can be re-glued, while larger drainage issues may need base work. Regular checks let you handle small fixes before they become major repairs. The following subsection explains how to maximize turf lifespan.
Extending turf life depends on good base construction, sensible use, and scheduled grooming. A well-compacted, well-draining base prevents settlement that causes low spots and uneven roll, so prioritize base quality during installation. Avoid heavy loads and don’t park vehicles or equipment on the green to prevent fiber crushing and backing damage. Set a grooming schedule that includes brushing high-traffic paths and redistributing infill annually or as usage requires. Watch for replacement triggers — heavy matting, persistent drainage failure, or extensive seam damage — and plan for staged replacement when repairs are no longer cost-effective.
For maintenance supplies, local vendors that stock infill sand, brushes, and edging materials reduce downtime and ensure compatibility with your turf system. Artificial Turf Express keeps in-stock infill and accessories suitable for putting greens and can supply common grooming tools plus seam and edging repair materials. Having a nearby source shortens maintenance response time and helps owners keep a steady upkeep routine.
Use this quick maintenance checklist to stay on top of care:
- Remove debris weekly : Keep the surface clear of leaves and organic matter to prevent compaction.
- Brush monthly : Reorient fibers and keep infill even with a non-metallic brush.
- Inspect seams and drainage seasonally : Catch small issues before they become big repairs.
- Top-up infill annually or as needed : Maintain consistent firmness and stimp characteristics.
These routines keep the green playable and delay major interventions. The next section breaks down costs and optional features that affect both budget and long-term value.
Costs and Additional Features to Consider for Your Backyard Putting Green
Major cost drivers include site preparation and grading, base materials and compaction, turf quality and face weight, drainage components, and optional features such as bunkers, fringe turf, chipping pads, lighting, and seating. Labor and contour complexity significantly affect price, as does removal of irrigation and disposal of excavated material. Homeowners can save with DIY labor on simple sites, but professional base work and drainage usually pay off in longevity and consistent stimp speeds. Below is a simple cost breakdown showing typical ranges for key categories and notes to guide decisions.
A clear cost breakdown helps you allocate budget to the items that most affect performance.
| Cost Category | Typical Cost Influence | Typical Total Example | Notes |
|---|---|---|---|
| Turf Material | Varies widely depending on fiber type, pile height, and product quality (entry-level to premium). | Small putting greens typically fall into the **lower** range; larger or premium selections move into the **mid** tier of total project costs. | Higher-grade turf materials improve durability and ball performance. |
| Base & Drainage | Moderate to high impact depending on grading needs, soil conditions, and drainage layers. | Simple installs fall into the **lower** cost bracket; projects with excavation or poor soil conditions trend **higher**. | Proper drainage prevents settling and extends turf lifespan. |
| Labor / Installation | One of the largest cost drivers, especially on contoured greens or custom shapes. | Straightforward, flat greens sit in the **mid** range; detailed shaping and slopes fall into the **higher** range. | Skilled installation improves true roll and overall playability. |
| Features & Accessories | Adds incremental cost depending on how many enhancements are selected. | Basic greens stay in the **lower** tier; projects with fringe, cups, lighting, or bunkers shift toward the **premium** tier. | Accessories increase versatility and realism. |
This table shows that investments in the base and turf have the biggest impact on performance and longevity, while decorative or training features are flexible. The next subsection gives example budgets for small, medium, and large projects and how features shift totals.
Example budgets illustrate size and choice impacts: a compact 200 sq.ft. DIY practice green with economical turf and careful base work may sit at the low end of material costs; a 1,000 sq.ft. professionally installed multi-hole green with pro-grade turf and lighting sits near the high end. Bunkers, engineered chipping pads, and custom edging can move a project from basic to premium quickly. Consider staging features over time — start with a well-built surface and add aesthetic or training elements later.
Popular landscaping elements can boost play value and curb appeal. Choices by budget tier include:
- Low-cost : Fringe turf, simple edging, and portable cups keep initial costs down.
- Mid-tier : Sand traps, fixed chipping pads, and basic pathway lighting add usability.
- High-tier : Integrated lighting, water features, and multi-level landscaping for a luxury finish.
When you’re ready to move from planning to buying, local suppliers with in-stock products and delivery options shorten lead times and help match turf specs to installation schedules. Artificial Turf Express stocks a wide range of turf grades, infill materials, and accessories for immediate pickup or delivery in the San Jose area and can provide quotes to align product selection with your budget and timeline. Request a local materials quote and coordinate delivery with your installer to keep the project on schedule.
A final quick list of common add-ons to consider:
- Fringe turf and edging : Improves aesthetics and secures turf edges.
- Bunkers and sand traps : Add realism and short-game variety.
- Chipping pads and target nets : Extend practice beyond putting.
- Lighting and seating : Make the green usable and enjoyable into the evening.
These add-ons affect cost and complexity but can be phased in so you prioritize core performance first and expand features later.
Frequently Asked Questions
What is the average lifespan of an artificial putting green?
Most artificial putting greens last roughly 8 to 15 years, depending on material quality, frequency of use, and maintenance. Higher-quality turf such as nylon usually outlasts polyethylene because it resists matting better. Regular brushing, infill checks, and proper care can noticeably extend the life of your green. Also account for local climate and UV exposure when estimating longevity.
How do I choose the right size for my backyard putting green?
Pick a size based on available space and how you plan to use the green. Small practice areas (100–400 sq ft) handle short putts; medium greens (400–1,000 sq ft) allow multiple holes and varied shots; larger greens (over 1,000 sq ft) accommodate more complex contours and play. Review yard dimensions, existing landscaping, and intended drills to determine the best fit.
What are the benefits of professional installation for a putting green?
Professional installation brings expertise in site prep, grading, and drainage — all critical to a reliable putting surface. Pros ensure proper compaction and shaping, which helps maintain consistent stimp speeds and prevents drainage problems. They also have specialized tools, materials, and warranty options that reduce the risk of installation errors. For predictable play and long-term performance, hiring professionals is often worth the investment.
Can I install an artificial putting green on a slope?
Yes — slopes can add challenge and variety, but they require careful planning for drainage and stability. Installations on slopes may need extra grading, retaining, or engineered base work to ensure a consistent roll. It’s a good idea to consult a professional installer to assess the slope and recommend the best approach.
What maintenance tasks are essential for keeping my putting green in good condition?
Essential tasks include regular debris removal, monthly brushing, and periodic infill checks. Weekly debris removal prevents organic buildup; monthly brushing reorients fibers and evens infill; seasonal seam and drainage inspections catch small issues early. Topping up infill annually or as needed keeps the surface firm and playable. A steady maintenance routine will preserve performance and delay major repairs.
Are there eco-friendly options for artificial putting greens?
Yes. Many manufacturers offer turf made from recycled materials and products designed to reduce water use. Look for turf with lower environmental impact and avoid options with harmful chemicals. Using permeable base materials for drainage and choosing locally stocked products can also improve the project’s eco profile.
Conclusion
The right artificial putting green design can turn your backyard into a practical, low-maintenance practice space that also looks great. By focusing on turf type, layout, base quality, and regular maintenance, you can create a surface that fits your goals — whether practicing strokes or entertaining guests. Explore our range of turf and accessories to find the best match for your project, and when you’re ready, we’re here to help you take the next step toward the perfect backyard putting green.