

Artificial putting green turf is a purpose-built synthetic surface that aims to reproduce the roll, speed, and consistency of a natural green while cutting down on upkeep and letting you play year-round. Picking the wrong turf or skimping on installation will quickly hurt performance, create premature wear, and add repair costs — so knowing the right specs up front protects both play and value. This guide walks homeowners through the attributes that matter — pile height, face weight, fiber type, base prep, drainage, infill, seaming, and cup installation — and explains how those pieces work together to affect ball roll and longevity. You’ll find practical checklists for choosing turf, clear base and drainage steps, numeric infill guidance, and simple maintenance routines tailored for backyard putting greens. We also point out common product types and helpful accessories and explain when to lean on suppliers and local delivery in the San Jose area. Read on for straightforward mistakes to avoid and precise fixes that deliver a stable, true-rolling green.
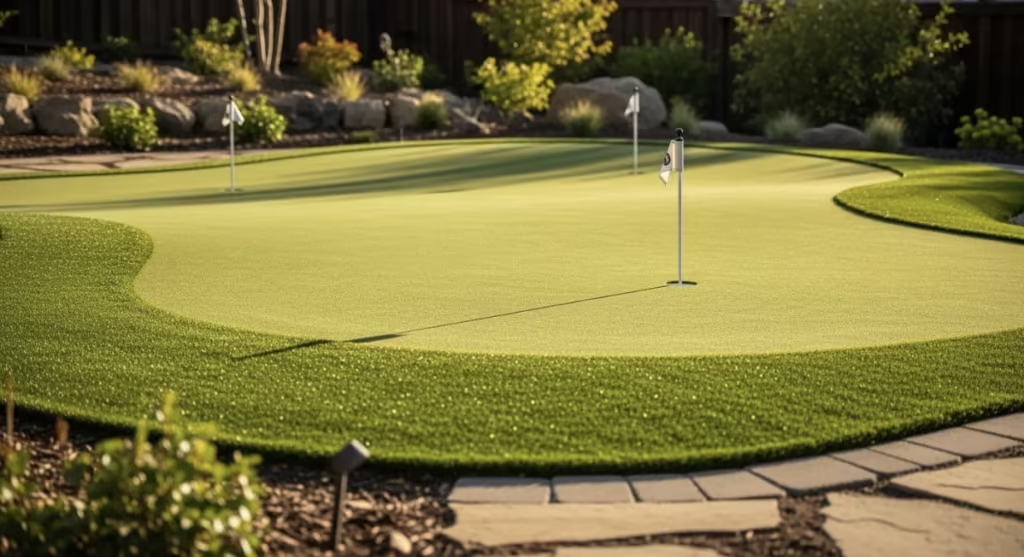
Replicating real-green behavior — including Stimp measurements — is a central design goal for home putting greens.
Artificial Putting Green Carpet for Home Use
The test surface was covered with artificial putting green carpet made for home lawns, then measured with a Stimpmeter to assess roll performance on both putting greens.
Measuring canopy anomaly influence on golf putt kinematics: Errors associated with simulated putt devices, SS Rana, 2018
What Are the Most Common Mistakes When Choosing Putting Green Turf?
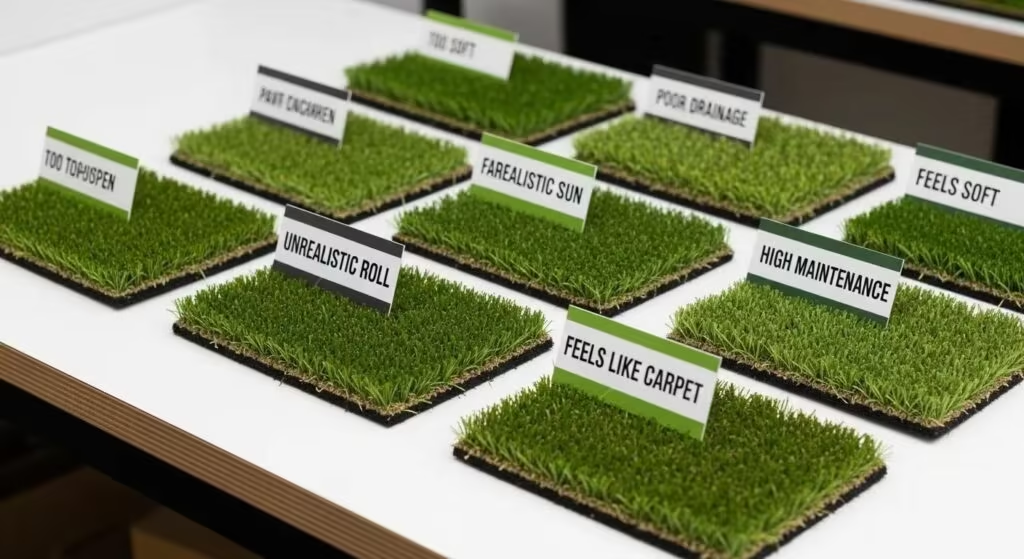
Choosing putting green turf means picking a surface built for putting performance — not standard landscape grass. Many homeowners accidentally buy landscape turf with taller pile, more drag, and a different backing, which slows the ball and produces inconsistent Stimp readings. Overlooking fiber type, UV stability, or face weight shortens life and changes ball behavior, and not matching pile height and density to how you’ll use the green (practice vs. performance) compromises playability. The right choice balances pile height, face weight/density, and fiber polymer to hit your target Stimp range and durability goals.
Here are the top selection mistakes and quick fixes:
- Buying landscape turf instead of putting green turf. Choose turf specifically labeled for putting greens — lower pile and uniform density matter most.
- Ignoring pile height and face weight. Match pile height and face weight to the ball roll you want and the traffic the green will see.
- Overlooking fiber material and UV resistance. Pick fibers rated for UV stability to prevent fast fading and breakdown.
- Not checking backing and seaming compatibility. Use turf with backing designed for reliable seam adhesion to avoid noticeable joins.
This table compares popular putting green SKUs to make selection easier.
Turf SKUs differ in pile height, face weight, and intended use — those specs determine roll characteristics.
| Turf SKU | Attribute | Value |
|---|---|---|
| Birdie Putt | Pile Height / Density | Low-pile, medium-high density for consistent roll |
| Eagle Putt | Face Weight / Stimp Range | Higher face weight, engineered for performance greens |
| Low-pile putting green turf (generic) | UV Resistance / Use | Designed for backyard practice; look for UV-treated fibers and warranty |
These side-by-side comparisons show how SKUs deliver measurable differences in roll and durability. Pick the SKU that lines up with your expected Stimp and how much wear the green will take.
For homeowners who want ready options, Artificial Turf Express stocks putting green turf options designed for backyard use and practice. Our San Jose inventory favors in-stock items for pick-up or delivery, helping you avoid long lead times that can delay installation. Ask about SKUs like Birdie Putt and Eagle Putt when confirming pile height and density so your turf matches the ball speed and maintenance level you expect.
Product callout — quick SKU reference (topic-first, supplier note):
| Product | Best For | Note |
|---|---|---|
| Birdie Putt | Casual backyard practice | Low-pile, consistent roll |
| Eagle Putt | Performance backyard green | Higher face weight, truer Stimp |
How Does Turf Type Affect Ball Roll and Durability?
Turf type controls ball roll and durability through three main attributes: pile height, face weight (density), and fiber polymer. Pile height changes how much the ball contacts fibers — lower piles reduce friction for faster, truer roll; taller piles add drag and slow the ball. Face weight and density create consistency: heavier face weight resists matting and keeps roll uniform. Fiber polymer (typically nylon or polypropylene) affects resilience and UV performance — nylon usually holds up better under heavy use and keeps roll more consistent, while polypropylene is more budget-friendly but can compress sooner.
Knowing how pile height, face weight, and Stimp relate is key when tuning a green for practice versus match-like speeds. A turf that hits your target Stimp today will keep behaving if it’s paired with proper base, infill, and UV-stable fibers. That brings us to material choices and when to prioritize durability over cost.
Which Artificial Grass Materials Are Best for Backyard Putting Greens?
Material choice is a balance of performance, durability, and price. Nylon, polypropylene, and hybrid fibers each offer trade-offs. Nylon resists crushing and usually preserves roll speed longer — a great pick for high-use or performance greens. Polypropylene is lighter and less expensive, suited to casual practice greens but prone to faster compression. Hybrid constructions blend features (denser thatch, proprietary fibers) to balance roll and resilience.
When evaluating materials, prioritize UV resistance and warranty coverage — sun accelerates fiber breakdown and color fade. A UV-treated fiber with a solid warranty reduces the risk of early replacement and keeps roll predictable. With materials chosen, proper base preparation is the next step so those material benefits actually translate into consistent play.
How Can Proper Base Preparation Prevent Installation Issues?

A well-built base provides a flat, stable, permeable foundation that keeps turf performing, prevents settling, and manages drainage. Base prep combines correct excavation depth, slope grading, compaction, and the right aggregate to form a firm sub-base that resists movement and supports seams. Skip compaction or use the wrong base material and you’ll see dips, uneven ball roll, and seam problems. Spending the time to get the base right saves maintenance and keeps the green true to its intended Stimp.
Follow these core steps for base preparation to avoid common installation problems:
- Excavate to the combined depth required for turf, infill, and base. Account for turf pile, infill layer, and recommended base depth.
- Grade with a slight slope (1–2%). Direct surface runoff without creating uneven playing spots.
- Compact each base layer to target firmness. Use mechanical compaction and test firmness before adding the next layer.
- Install edge restraints and weed barrier. Secure edges to prevent lateral movement and reduce vegetation intrusion.
Below is a practical comparison of common base materials to help you choose based on drainage and compaction needs.
The right base material depends on drainage goals, compaction targets, and budget.
| Base Material | Depth Recommended | Compaction Method | Drainage Properties |
|---|---|---|---|
| Crushed Granite | 2–4 in (finish) over compacted sub-base | Plate compactor to 95% standard Proctor | Excellent permeability when angular |
| Class II Road Base | 3–6 in under finish layer | Mechanical compaction to specified density | High load-bearing; moderate permeability |
This table highlights trade-offs: angular aggregates drain well and lock under compaction, while finer materials may need stabilizers to stay firm.
To avoid installation mistakes: pick the correct aggregate profile, compact in lifts, and verify slope and flatness before laying turf. Artificial Turf Express supplies base materials and common installation tools and offers local delivery or in-stock pick-up for San Jose-area projects, which simplifies sourcing aggregates and edge restraints. If you’re unsure about depth or compaction targets, consult your supplier before you dig.
What Are the Best Practices for Excavation, Grading, and Compaction?
Excavation, grading, and compaction protect turf performance by removing soft soils, setting the right slope, and creating a compacted base that resists settlement. Start by excavating to the total depth needed for sub-base, finish base, turf, and infill; remove organic topsoil and roots that cause future sinkage. Establish a consistent slope of about 1–2% to encourage runoff and avoid flat pockets where water can pool. Compact in 2–3 inch lifts with a plate compactor until you hit the target density, testing firmness across the site to ensure uniform support.
Common DIY errors include under-excavating, skipping compaction lifts, and not verifying slope. Fixing those prevents uneven surfaces and dips that ruin ball roll. A properly compacted, graded base also makes seaming and cup installation much easier and more reliable.
Why Is a Weed Barrier Essential for Long-Lasting Putting Greens?
A woven geotextile weed barrier protects the playing surface by stopping root intrusion, limiting vegetation, and separating base layers to preserve drainage. A good weed barrier reduces organic growth that can push up the backing or create low spots. Best practice: overlap barrier seams by several inches, secure the fabric to the sub-base, and cut turf over the barrier to avoid exposed edges that invite weeds. Skipping a quality barrier or using a thin fabric increases the chance of root problems and future maintenance headaches.
Choose a durable, non-biodegradable geotextile to reduce replacements and keep the surface stable. Proper fastening around edges and seams helps the barrier remain effective over time and supports the drainage approach in the next section.
What Drainage Solutions Avoid Synthetic Putting Green Problems?
Proper drainage for synthetic putting greens combines slope design, permeable base layers, and optional collection systems to prevent puddling and surface damage. Good drainage reduces standing water that can lead to moss, microbial growth, and backing failure — and it keeps play consistent by stabilizing the surface. Typical solutions include grading for runoff, using permeable aggregates in the base, and installing French drains or subsurface piping where runoff isn’t enough. The right mix depends on soil type, local rainfall, and the green’s footprint.
Here are practical drainage strategies and when to use them:
- Graded permeable sub-base : Use where natural slope allows direct runoff and rainfall is moderate.
- Permeable aggregate layers with geotextile : Best when native soil drains slowly but surface runoff is possible.
- French drains or perforated pipe : Use for sites with poor percolation or concentrated runoff points.
Knowing your site’s permeability and runoff behavior helps you pick the right method and avoid failures like clogged layers or insufficient slope.
How Does Proper Drainage Prevent Puddling and Mold?
Proper drainage stops puddling and mold by moving water away quickly, reducing the moisture that supports microbial growth. A permeable base with angular aggregate and a geotextile separator allows rapid percolation while keeping the base structure intact and preventing saturated pockets that damage backing. Paired with surface grading, the system channels water to storm drains or a French drain, cutting down on standing water and the risk of mold or algae. Regular inspection and clearing of debris maintain flow, and repairing low spots prevents localized moisture build-up.
In climates like San Jose, occasional heavy storms can test drainage, so building in redundancy — extra slope or overflow drains — adds resilience. Good drainage gets your green usable sooner after rain and extends turf life.
What Are Effective Methods for Installing Drainage Layers and French Drains?
An effective drainage system layers geotextile fabric over the subgrade, places an angular aggregate bedding for permeability, and installs perforated pipe for a French drain when needed; spacing and slope are crucial. Start with compacted subgrade, lay a geotextile separator, add a 3–6 inch aggregate bedding, and set the perforated pipe on a 1% slope toward an outlet. Cover pipe with more aggregate and wrap geotextile to limit clogging from fines, then install the finish base layer before turf. Avoid overly fine aggregates — coarser angular materials keep voids for faster flow.
Common mistakes include insufficient outlet slope, choosing rounded aggregates that compact and reduce permeability, and failing to wrap pipe with geotextile, which speeds clogging. For complex sites, consult a drainage specialist to size pipe and design suitable outlets.
How to Apply Infill Correctly to Enhance Putting Green Performance?
Infill stabilizes fibers, affects roll, and supports drainage — so correct selection and application are essential for consistent ball behavior and turf life. Silica sand is the typical choice for putting greens because its particle shape and size stabilize fibers with minimal added friction, preserving a natural roll. The amount and distribution of infill control green speed: too little lets the ball bounce and fibers collapse; too much creates drag and slows the ball. Proper brushing and settling finish the installation for a consistent Stimp and long-term durability.
Research highlights the importance of infill type and quantity, especially silica sand, in achieving the intended performance and preserving synthetic turf surfaces.
Synthetic Turf Infill & Maintenance for Optimal Performance
Studies on sand-filled, second-generation synthetic turf identify optimum infill quantity for a given fiber length and note that properly graded silica sand was used in tests.
The effect of maintenance on the performance of sand-filled synthetic turf surfaces, 2010
Below is a comparison of common infill choices and how they influence playability and upkeep.
Choosing the right infill balances fiber stability, roll, and maintenance needs.
| Infill Type | Function | Recommended Qty (lbs/sq ft) | Effect on Roll |
|---|---|---|---|
| Silica Sand | Stabilizes fibers; minimal friction | 0.5–1.5 lbs/sq ft (varies by turf) | Promotes truer, consistent roll |
| Crumb Rubber | Shock absorption, cushioning | 1.5–3.0 lbs/sq ft | Increases drag; not ideal for pure putting greens |
| Zeolite / Specialty | Odor control, moisture wicking | 0.3–1.0 lbs/sq ft | Slightly variable; can maintain dryness |
To apply infill correctly, spread it in even passes, brush fibers upright, allow settling, and retest roll before final tuning. Before you begin, check turf orientation and backing, use a mechanical drop spreader for even coverage, and a stiff-bristle brush to work material into the pile. Apply thin passes rather than a single heavy load and measure coverage by weight to reach the target lbs per square foot. After application, groom the turf by brushing against the pile to stand fibers up and allow 24–72 hours for settling before testing Stimp and making small adjustments.
Artificial Turf Express stocks silica sand and installation accessories like bender boards and pro brushes, with many items available for San Jose pick-up or local delivery. Buying recommended infill and tools from one supplier simplifies logistics and helps ensure you get the right mesh size and quantity for your turf SKU.
Which Infill Types Are Best for Artificial Putting Greens?
Silica sand is the go-to infill for putting greens: angular silica stabilizes fibers with minimal drag, producing consistent ball roll and reliable Stimp readings. Crumb rubber adds cushioning for multi-use areas but increases drag, so it’s not ideal for pure putting surfaces. Zeolite and specialty blends help control moisture and odors in pet or humid settings but can slightly change roll characteristics. For true putting performance, silica sand is the standard pick.
When selecting infill, check mesh size and cleanliness — well-graded silica avoids dust and compaction problems that hurt drainage and roll. Those choices lead directly to proper quantity and distribution to fine-tune green speed.
What Is the Correct Infill Quantity and Distribution for Optimal Ball Roll?
Correct silica sand amounts usually fall between about 0.5 and 1.5 pounds per square foot for low-pile putting greens, though exact needs depend on face weight and pile density. Spread infill evenly in several light passes using a drop spreader and brush after each pass to embed grains between fibers. Measure coverage by weight per area and test ball roll after initial settling; add small increments if the roll is too lively or remove a bit (by brushing and extracting excess) if the roll is too slow. Frequent brushing during the first weeks helps the infill settle evenly and prevents local drag differences.
Fine-tuning is iterative: apply, brush, test, and adjust until the desired Stimp is stable across the surface, then record the final lbs/sq ft for future maintenance.
How to Avoid Seaming and Cup Installation Errors for a Professional Finish?
Invisible seams and properly set cups are critical for both looks and playability — mistakes here show up immediately in ball roll and appearance. Seaming errors usually come from poor surface prep, mismatched pile direction, low-quality seam tape or adhesive, and not applying enough tension when joining panels. Cup mistakes include off-center holes, cups that sit high or low, and weak packing around the cup frame — all of which affect ball behavior and durability. Getting seams and cups right during installation gives you a professional finish and consistent play.
Use these seaming and cup best practices to minimize visible joins and ensure cup reliability:
- Ensure turf panels are properly tensioned and pile direction matched before seaming.
- Use seam tape and adhesive rated for your turf backing and test the seam under ball roll.
- Cut precise cup holes, set cup framing flush with the surface, and pack around the cup for stability.
What Are Common Seaming Mistakes and How to Prevent Them?
Common seaming mistakes include mismatched pile nap, too little seam overlap, wrong adhesive choice, and failing to tension turf before bonding — all of which create visible joins and inconsistent roll. Prevent these issues by aligning pile nap across panels, trimming edges squarely, using seam tape rated for the backing, and following adhesive instructions with proper cure time. Tension turf along seams before applying adhesive so fibers lie flat and the seam stays invisible under play. Always roll a ball across the seam before final trimming to confirm it doesn’t change roll behavior.
Solid seam prep protects both the look and functional roll of the green, and these steps lead naturally into correct cup installation methods that preserve consistent putting speed.
How to Install and Level Golf Cups Properly?
Installing golf cups requires accurate hole cutting, a rigid cup frame, and packing that keeps the cup level with the turf so the rim is flush and doesn’t impede the ball. Start by marking cup locations and cutting a hole sized for the cup frame. Set a rigid sleeve or frame into a compacted sand or gravel bed for vertical stability. Pack tightly around the sleeve and confirm the cup rim is exactly level with the turf surface; finish by neatly edging turf to the cup and securing the surrounding turf to prevent uplift. Test each cup by rolling balls from multiple angles to ensure consistent behavior, and tweak packing as needed.
A properly installed cup resists lateral forces and preserves green speed — recheck level after settling to complete a professional installation.
What Are Best Practices for Long-Term Maintenance and Problem Prevention?
Regular maintenance keeps a putting green true, extends turf life, and prevents common failures like seam separation, uneven surfaces, and drainage decline. Focus on brushing to keep fibers upright, clearing debris to protect drainage, topping up infill as needed, and inspecting seams to catch early gaps. A seasonal routine cuts down on major repairs and keeps Stimp consistent. Address small issues early — recompact a spot, patch a seam, or add infill — to avoid bigger interventions later.
Follow this maintenance checklist to protect playability and appearance:
- Monthly brushing: Use a stiff nylon brush to lift fibers and redistribute infill.
- Quarterly debris clearing: Remove leaves and organic material to preserve drainage.
- Annual inspection: Check seams, edges, cup stability, and base condition.
Consistent maintenance keeps performance steady and makes small fixes manageable — and knowing when to call a pro is part of effective care.
How Should Homeowners Clean and Brush Their Artificial Putting Greens?
Cleaning and brushing are simple but should be done regularly to maintain playability and drainage: sweep or blow off loose debris weekly, brush the turf monthly to stand fibers upright and redistribute infill, and spot-clean spills with mild detergent and water. Use a stiff nylon broom or mechanical brush for larger areas, brushing against the pile to restore upright fibers; avoid metal rakes that can damage fibers and backing. For sanitizing, use a manufacturer-recommended cleaner sparingly and rinse thoroughly to avoid residue. Seasonal checks should include clearing drain outlets and removing organic buildup that reduces permeability.
Regular, gentle maintenance prevents many common issues and sets you up to troubleshoot more serious problems when they occur.
How to Address Uneven Surfaces, Repairs, and Odor Control?
Uneven spots usually come from base settling, poor compaction, or local infill loss — diagnose the cause before repairing to prevent repeats. Small depressions can often be fixed by removing turf in the affected area, regrading and re-compacting the base, replacing infill, and reseaming the panel. For seam gaps, clean the area, apply the correct adhesive and seam tape, and press panels together under tension to restore a flat surface. Odors typically stem from organic debris or pet use; using zeolite infill or enzymatic cleaners can neutralize smells and help keep the surface dry to limit bacterial growth.
For persistent or large problems, bring in a professional installer or supplier to avoid repeated DIY fixes. Artificial Turf Express can advise on repair materials, replacement patches, and in-stock accessories, and arrange pick-up or local delivery for items you need to restore your green.
Frequently Asked Questions
What is the lifespan of artificial putting green turf?
Lifespan varies with material quality, installation, and maintenance. Generally, high-quality nylon turf can last 15 to 20 years, while polypropylene options typically last about 8 to 12 years. Regular maintenance — brushing, cleaning, and infill management — extends life. UV resistance is also critical: UV-treated fibers resist fading and breakdown and help the turf last longer.
How often should I perform maintenance on my putting green?
A consistent maintenance schedule keeps the green in top shape. Monthly brushing to lift fibers and redistribute infill, weekly debris removal to protect drainage, and quarterly inspections for seams and overall condition are a good baseline. Annual deep cleaning and infill top-ups help maintain performance. Sticking to this routine prevents major repairs and ensures reliable play year-round.
Can I install putting green turf myself, or should I hire a professional?
DIY installation is possible but demands careful planning, proper tools, and knowledge of best practices. If you’re comfortable with excavation, grading, and drainage work, you may complete the project yourself. For complex drainage, precise compaction, or a flawless finish, hiring a professional usually yields a higher-quality result and can save time and future costs.
What are the signs that my putting green needs repairs?
Look for visible seams, uneven surfaces, or areas where turf has settled or lifted. Inconsistent ball roll or drainage problems — puddling after rain — are signs repair is needed. Regular inspections help catch issues early so you can fix them before they become major problems.
How can I improve drainage on my synthetic putting green?
Improve drainage by ensuring the base is properly graded for runoff (1–2% slope) and using permeable aggregates in the base layer. If problems persist, install French drains or perforated pipes to carry excess water away. Regularly clear debris from drainage outlets and check for low spots that trap water.
What should I do if my putting green develops odors?
Odors usually come from organic debris or pet waste. Start by cleaning the surface and removing debris, then spot-clean with mild detergent and water. Consider zeolite-based infill to control odors and moisture. If smells persist, use enzymatic cleaners to neutralize them. Regular cleaning and keeping the surface dry will prevent odor problems from returning.
Conclusion
Picking the right putting green turf matters — it directly affects ball roll, playability, and longevity. By understanding key specs like pile height, face weight, and fiber material, homeowners can avoid common mistakes and get the green performance they want. Proper installation, drainage, and regular maintenance extend turf life and keep play consistent. Browse our selection of premium putting green products to upgrade your home setup and enjoy better putting at home.