


This guide explains the technical and practical steps for planning and installing a multi-hole backyard putting green. It reviews layout options for two-, three-, and four-hole designs, clarifies material choices and installation methods, and outlines maintenance and performance considerations, helping homeowners make informed decisions and achieve consistent playability.
Design Considerations:
Designing a multi-hole green requires decisions that affect playability and longevity: overall footprint, hole count, geometry and routing, sun exposure, drainage strategy, and surface contours. Each factor alters ball roll and installation complexity. Properly designed undulations and breaks enhance shot variety while drainage and orientation preserve surface performance.
For technical design input and site-specific recommendations, consult with specialist backyard putting green contractors.
Materials Needed:
A performance-oriented putting green depends on materials selected for turf performance, base stability, and edge retention. Choose components specified for golf use and compatible with your site conditions.
- Artificial Turf: Ideal for putting greens, specialized turf provides a smooth, realistic surface and can withstand various weather conditions. Ensure you choose turf specifically designed for golf to achieve optimal performance.
- Infill Materials: Options like silica sand or crumb rubber can improve playability by providing stability and enhancing the feel underfoot. The right infill helps maintain the shape and longevity of the green.
- Edging Materials: Materials such as landscape timbers or pavers establish a border for the putting green and help contain gravel or infill materials.
Specifying quality turf, the correct infill, and robust edging reduces long‑term maintenance and maintains consistent ball roll.
Installation Steps:
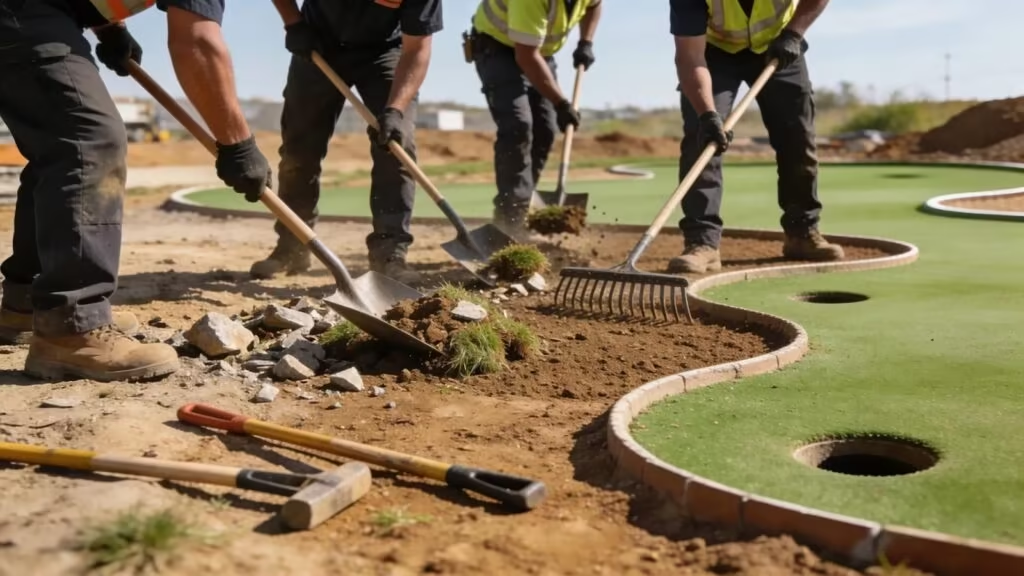
Installation follows a sequence that prioritizes surface performance and drainage: site clearing and grading, engineered base construction, precise turf placement, and secure finishing of holes and edges.
- Site Preparation: Clearing the area of debris and leveling the ground is crucial. Take time to survey the landscape to understand drainage patterns and ensure a proper foundation.
- Base Layer Installation: Laying down a base layer of crushed stone or gravel provides drainage and stability for the turf. This base should be compacted firmly to prevent settling over time.
- Turf Laying: Once the base is prepared, roll out the synthetic turf and cut it appropriately to fit the desired shape. Use landscape staples or nails to secure the turf.
- Final Touches: Adding golf cups and flags will complete the installation. These elements not only enhance visual appeal but also provide functional practice areas.
Following a controlled workflow and inspecting compaction and seam alignment during each stage produces a durable, true-rolling surface.
Maintenance Tips:
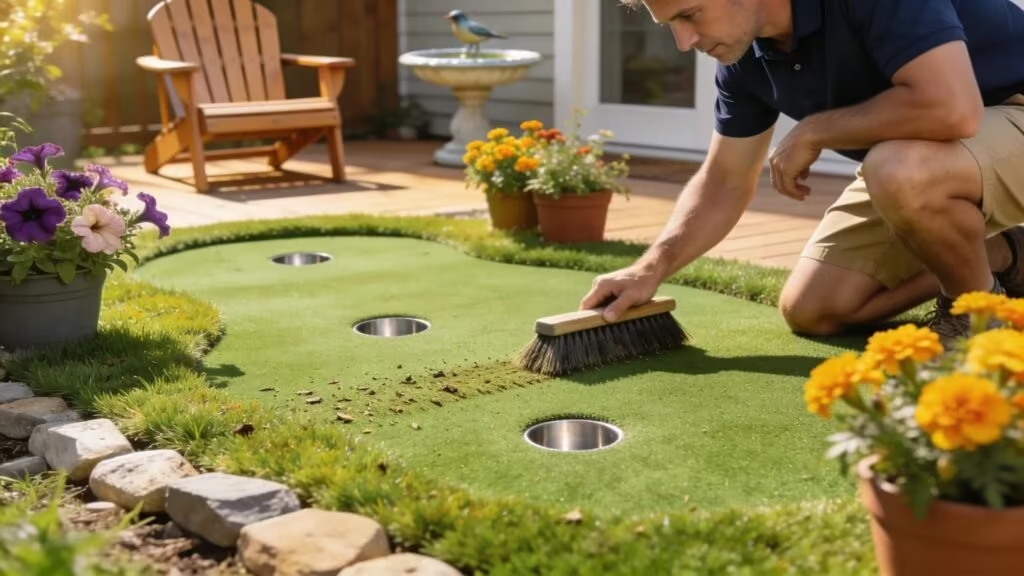
Routine maintenance preserves performance: brush fibers regularly to keep the pile upright, remove debris to prevent surface contamination, and monitor infill and seams for early signs of wear.
- Regular Brushing: Use a broom or brush to keep the fibers standing upright and prevent matting. This enhances the overall look and feel of the turf.
- Regular Inspections: Check for any areas of wear or damage. Address these issues promptly to avoid extensive repairs later.
- Seasonal Adjustments: Depending on the climate, seasonal care such as leaf removal or snow clearing will protect the turf from damage.
Implementing scheduled inspections and corrective maintenance extends service life and preserves consistent roll characteristics.
What Are the Key Benefits of Designing a Multi-Hole Backyard Putting Green?
A multi-hole putting green delivers practical benefits: reduced lawn upkeep compared with turf grass, a defined practice area to develop putting skills, and an attractive hardscape feature that can enhance property appeal.
How Does a Multi-Hole Layout Enhance Backyard Golf Practice?
Multiple holes create variable putt lengths, angles, and breaks, allowing players to practice a range of outcomes and simulate course conditions. That variation improves precision and decision-making across skill levels while offering a convenient, shared practice space.
What Are the Typical Sizes and Shapes of Multi-Hole Putting Greens?
Backyard putting greens typically range from 400 to 1,000 square feet and can be configured as rectangles, kidney shapes, or circles to match site constraints. Shape choice influences hole routing and the number of usable shot lines.
How to Plan Your Multi-Hole Putting Green Layout: Hole Placement and Design Strategies
Layout planning should prioritize play flow, variety, and surface grading. Map hole locations to create differing distances and angles, align lines of play with natural contours, and ensure transitions allow continuous practice without excessive walking.
- Strategic Hole Placement: Place holes in varied locations to encourage different shot types and levels of difficulty. This diversity makes practice more interesting and beneficial.
- Visual Appeal: Align holes with natural landscape features or planned contours. This alignment enhances the overall visual appeal and integrates it with the surrounding environment.
- Continuous Play: Ensure a logical flow for play, allowing easy transition from one hole to the next. This facilitates seamless practice experiences without interruptions.
Designs that balance challenge and play continuity yield higher user engagement and more efficient practice sessions.
What Are the Best Hole-Placement Techniques for 2, 3, or 4 Hole Greens?
Design choices depend on the hole count: two-hole designs benefit from opposing placements to create varied distances; three- and four-hole layouts can use clustered or staggered placements to create multiple shot scenarios while maximizing available space.
- Varied Challenges: Spacing holes at various distances enables challenging shots for golfers of all levels.
- End-to-End Placement: For two holes, consider placing them at opposing ends to create a stimulating layout.
- Clustered Groupings: For three or four holes, a clustered approach encourages a variety of shot dynamics and practice opportunities.
Applying these placement patterns yields meaningful variety in practice without increasing installation complexity.
How Do Green Size, Shape, and Slope Affect Playability and Installation?
Size and shape determine the range of hole placements; slope and contour control ball speed and line. Steeper grades increase challenge but require more precise grading and base preparation to ensure stable roll and drainage.
How to Select the Right Artificial Turf for Multi-Hole Putting Greens
Select turf designed for golf use and match the pile height, fiber composition, and density to your play objectives. Confirm UV resistance and manufacturer performance specifications for outdoor exposure and expected traffic levels.
- Type of Turf: Select high-quality synthetic grass specifically designed for golf to mimic a natural putting experience. This includes attention to pile height and turf density.
- Durability and Performance: Consider turf with excellent UV resistance and longevity for outdoor use. Quality turf can significantly enhance the practice experience.
- Maintenance Requirements: Evaluate the maintenance needs based on your lifestyle. Select a product that fits your routine capabilities and preferences.
Specify turf with documented UV stability, appropriate pile height, and fiber density to achieve predictable ball roll and reduce long‑term maintenance.
What Are the Key Turf Properties: Pile Height, Density, and UV Resistance?
Key turf properties determine play characteristics: pile height (fiber length) influences ball contact, density affects surface firmness and consistency, and UV resistance determines color and material longevity under sun exposure.
- Pile Height: An ideal pile height for putting greens typically ranges from 0.5 inches to 1 inch. This height mimics natural grass closely and supports smooth ball rolling.
- Density: the degree of fiber packing in the turf. Higher density simulates natural grass and enhances playability, making it a preferred choice for putting greens.
- UV Resistance: Selecting UV-resistant turf helps ensure longevity by resisting sunlight-induced decay. This property can prolong the installation’s lifespan while maintaining its aesthetic appeal.
Choosing turf that balances pile height, high stitch density, and proven UV stabilizers delivers the most consistent on‑green performance.
Which Artificial Golf Turf Products Best Suit Backyard Putting Greens?
Look for polyethylene-based putting turfs for realistic ball response, engineered crushed stone base materials to provide drainage and stability, and compatible infill products—such as silica sand or rubber granules—to tune firmness and ball speed.
- P varieties: Look for turf manufactured with polyethylene fibers for a realistic feel and high durability.
- Crushed Stone: Often recommended as a base layer, this enhances drainage and stability for long-term use.
- Infill Materials: Use options such as silica sand or rubber granules to improve turf performance.
Sourcing these components from reputable manufacturers and matching product specifications to site conditions improves long‑term performance and user satisfaction.
What Installation Supplies and Methods Are Required for Multi-Hole Putting Green Projects?
Required supplies include standard excavation and compaction tools, base aggregate and geotextile if needed, precise cutting tools for turf, seam adhesives and fastening systems, and hole cups designed for synthetic greens.
- Base Preparation Tools: Shovels, rakes, and rollers are necessary for leveling the ground and applying the base layer.
- Turf Installation Equipment: Utility knives are essential for precise cuts, while landscape staples or nails secure the turf.
- Maintenance Supplies: Brushes and vacuums help maintain the surface and ensure optimal performance over time.
Using the correct materials and following engineered installation methods reduces the risk of settlement, poor drainage, or inconsistent roll.
Which Installation Tools and Adhesives Are Recommended for DIY and Professional Setups?
Essential tools include accurate cutting instruments, plate compactors for the base, turf seam tape, and high‑strength adhesives rated for exterior use, and, where needed, sewing or mechanical joining for high‑stress seams.
- Cutting Tools: A utility knife or turf cutter is essential for precise turf shaping during installation.
- Adhesives: Use high-quality turf adhesives to secure edges and seams, ensuring longevity and preventing any unraveling.
- Sewing Equipment: In certain cases, sewing turf edges can enhance durability, particularly in high-traffic areas.
Select adhesives and seam systems specified by the turf manufacturer and use the appropriate compression and curing procedures to ensure seam strength.
What Are the Step-by-Step Procedures for Installing Multi-Hole Artificial Turf Greens?
Installation should proceed in planned stages: mark the layout, perform earthworks and grading, install the engineered base and complete compaction, place and trim turf, set hole cups, and finish edges.
- Plan the Layout: Determine the shape and number of holes before starting installation. Mark these on the ground.
- Prepare the Site: Clear the area, level the ground, and lay a well-compacted base of crushed stone or gravel for stability.
- Position the Turf: Roll out the synthetic turf, ensuring it fits snugly around the holes. Secure it using landscape staples or nails along the perimeter.
- Finalize the Installation: Install the golf cups and flags to complete the green and make it ready for use.
Adhering to each procedure and verifying tolerances—grade, compaction, and seam flatness—will produce a professional result and consistent ball behavior.
How to Maintain and Repair Your Multi-Hole Backyard Putting Green for Longevity
Maintain longevity through scheduled cleaning, periodic infill checks, and prompt seam or patch repairs. Early intervention for wear areas prevents larger failures and preserves playing quality.
- Cleansing: Regularly remove debris, such as leaves and dirt, to preserve the turf’s appearance.
- Inspections and Repairs: Conduct seasonal inspections for signs of wear. Address minor repairs promptly to avoid more significant issues.
- Turf Care: Regular brushing and periodic washing can reinvigorate the fibers and keep them upright for optimal performance.
Establish a maintenance schedule that tracks brushing frequency, infill top-ups, and inspection outcomes to protect investment value.
What Are the Best Practices for Turf Cleaning, Infill Maintenance, and UV Protection?
Keep the surface clean with soft brushes or low‑suction vacuums, monitor and replenish infill to maintain fiber support, and specify UV-stabilized turf to limit degradation from sun exposure.
- Turf Cleaning: Use a soft-bristled brush or a vacuum to remove debris and maintain the turf’s natural look.
- Infill Management: Periodically check infill levels and replenish them as needed to support the turf fibers.
- UV Protection: Choose turf with UV resistance to safeguard against weathering and fading from sun exposure.
Proactive cleaning and infill management combined with UV‑resistant materials maintain aesthetics and predictable play over time.
How Can Common Green Repairs Be Effectively Managed?
Manage repairs by inspecting seams and high‑traffic zones, replacing or topping infill where settled, and using manufacturer‑recommended patching or professionally executed seam repairs for extensive damage.
- Assessment: Regularly assess for types of wear, such as seams coming undone or areas losing infill.
- Prompt Repairs: Address any detected issues immediately to prevent escalation.
- Professional Help: If the issues are extensive, consider consulting a professional specializing in turf repair.
Timely, specification‑based repairs prevent progressive failure and maintain the green’s play characteristics.
Where to Find Expert Support and Custom Multi-Hole Putting Green Services in the Greater Bay Area
Residents of the Greater Bay Area seeking design, supply, or installation services can contact local specialists for site assessments, custom designs, and certified installations. For assistance, you can contact Artificial Turf Express located at 370 Umbarger Rd, San Jose, CA, 95111, or call (408) 317-4730.
How Do Custom Golf Green Contractors Enhance Your Backyard Putting Green Project?
Custom contractors provide technical design, precision grading, component specification, and installation quality control. Their experience reduces installation risk and ensures the finished green meets targeted ball speed and roll consistency.
What Local Product and Installation Resources Does Artificial Turf Express Provide?
Artificial Turf Express supplies putting green turf, base aggregates, and installation materials, and can advise contractors, landscapers, and DIY homeowners on product selection and installation methods. Their local inventory and support simplify sourcing and technical decisions.
Frequently Asked Questions
1. How much does it typically cost to install a multi-hole putting green?
Installation costs vary with size, material quality, and design complexity. Total project investment depends on size, material quality, and design complexity, including expenses for turf, base materials, labor, and fittings such as cups and flags. Obtain site‑specific estimates from local contractors for accurate pricing.
2. What are some common mistakes to avoid when designing a putting green?
Frequent design errors include inadequate drainage planning, selecting turf not suited to golf use, poor hole spacing, and ignoring sun exposure. Address these issues through site analysis, specification review, and consultation with experienced installers.
3. How often should I refresh the infill in my putting green?
Check infill levels periodically and plan to refresh them every 1 to 3 years, depending on use and settlement. Regular inspection and top‑ups help maintain turf support and consistent ball roll.
4. Can I install a putting green on uneven terrain?
Yes. Uneven sites require grading, engineered base layers, and compaction to create a stable, well‑draining platform. Using crushed stone or gravel and an appropriate base design mitigates settlement and drainage problems.
5. What features can enhance the playability of my multi-hole putting green?
Incorporating controlled undulations, varied hole spacing, chipping areas, and varied hole sizes increases the practice value. Landscaping features can add visual interest and tactical obstacles without compromising surface performance.
6. Should I consider hiring a professional for installation, and why?
Professional installers provide precise grading, base engineering, and material specification expertise that reduces the risk of post‑installation issues. They also offer warranties and technical support that can protect your investment.
7. What maintenance tools do I need for my putting green?
Essential maintenance tools include a stiff broom for brushing the pile, a low‑suction vacuum for debris, a utility knife for repairs, and rakes or shovels for infill adjustments. Using the right tools preserves appearance and playability.
Conclusion
A well‑designed multi‑hole putting green delivers reliable practice conditions and a durable landscape feature when built with the correct materials and installation methods. Consult with experienced professionals to align design, turf specifications, and installation procedures to your goals, and select quality turf and base systems to ensure consistent performance and longevity.


